


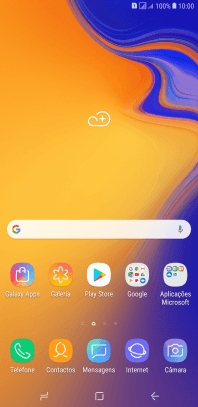
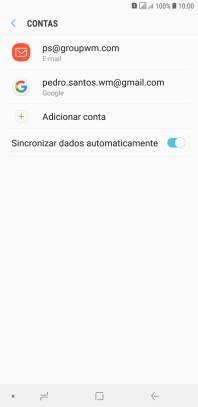
1. Procure "Contas"
Deslize o dedo para baixo a partir do topo do ecrã.


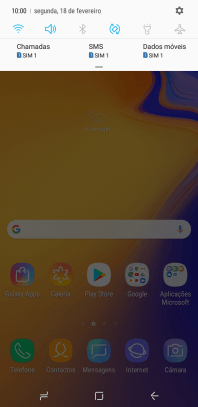
1. Procure "Contas"
Prima o ícone de definições.


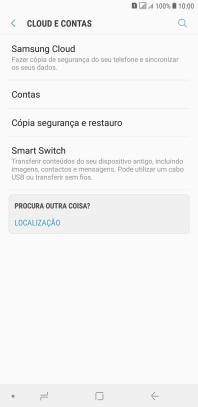
1. Procure "Contas"
Prima Cloud e contas.


1. Procure "Contas"
Prima Contas.


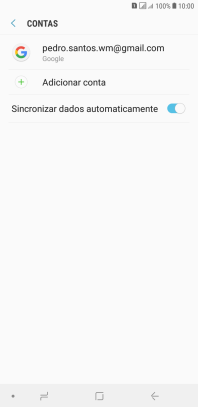
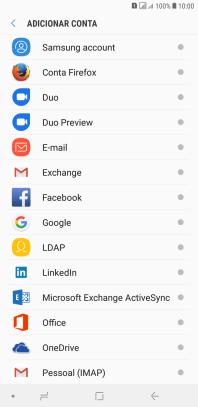
2. Crie uma nova conta de e-mail
Prima Adicionar conta.


2. Crie uma nova conta de e-mail
Prima E-mail.


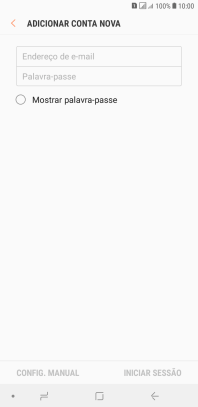
3. Introduza o endereço de e-mail
Prima Endereço de e-mail e introduza o seu endereço de e-mail Vodafone.


4. Introduza a password
Prima Palavra-passe e introduza a password da sua conta de e-mail na Vodafone.


4. Introduza a password
Prima INICIAR SESSÃO.


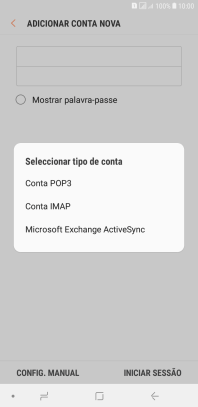
5. Escolha o tipo de servidor
Prima Conta IMAP.


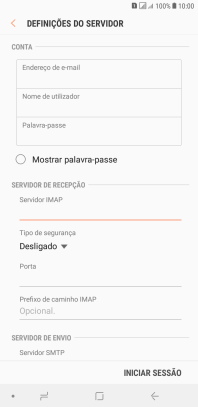
6. Introduza o nome de utilizador
Prima o campo sob "Nome de utilizador" e introduza o nome de utilizador da sua conta de e-mail na Vodafone.
7. Introduza o servidor de receção
Prima o campo sob "Servidor IMAP" e prima imap.vodafone.pt.


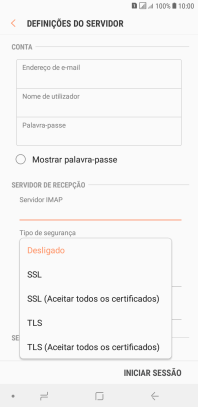
8. Ative a encriptação na receção de e-mails
Prima a lista suspensa sob "Tipo de segurança".


8. Ative a encriptação na receção de e-mails
Prima SSL para ativar a função.
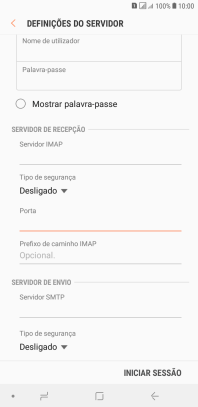
9. Introduza o número da porta de receção
Prima o campo sob "Porta" e prima 993.


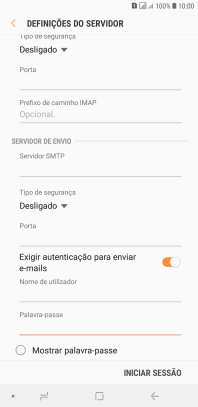
10. Introduza o servidor de envio
Prima o campo sob "Servidor SMTP" e prima smtp.vodafone.pt.


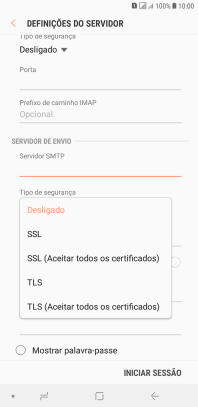
11. Ative a encriptação no envio de e-mails
Prima a lista suspensa sob "Tipo de segurança".


11. Ative a encriptação no envio de e-mails
Prima TLS para ativar a função.
12. Introduza o número da porta de envio
Prima o campo sob "Porta" e prima 587.


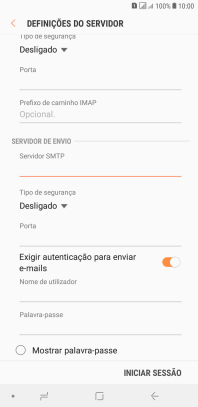
13. Ative a autenticação SMTP
Prima o indicador junto a "Exigir autenticação para enviar e-mails" para ativar a função.
13. Ative a autenticação SMTP
Prima o campo sob "Nome de utilizador" e introduza o nome do utilizador do servidor de envio do seu fornecedor de e-mail.


13. Ative a autenticação SMTP
Prima o campo sob "Palavra-passe" e introduza a password do servidor de envio do seu fornecedor de e-mail.


13. Ative a autenticação SMTP
Prima INICIAR SESSÃO.


14. Volte ao ecrã inicial
Prima a tecla de início para voltar ao ecrã inicial.
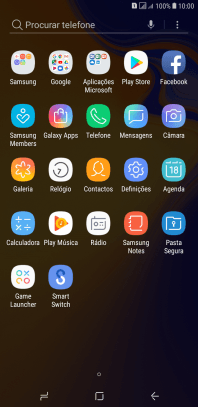
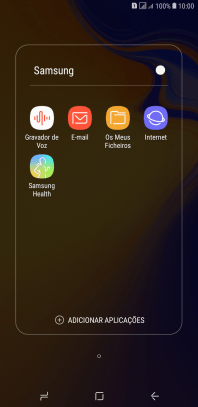
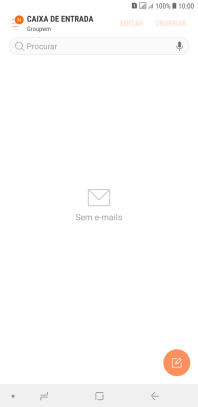
15. Procure "E-mail"
Deslize o dedo para cima no ecrã.


15. Procure "E-mail"
Prima Samsung.


15. Procure "E-mail"
Prima E-mail.


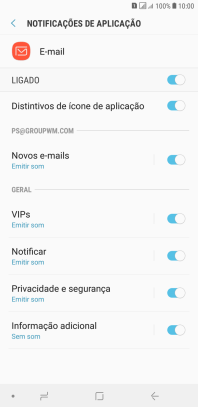
16. Ative ou desative a notificação de e-mails
Deslize o dedo sobre o ecrã da esquerda para a direita.


16. Ative ou desative a notificação de e-mails
Prima o ícone de definições.


16. Ative ou desative a notificação de e-mails
Prima Notificações.


16. Ative ou desative a notificação de e-mails
Prima o indicador sob a conta de e-mail pretendida para ativar ou desativar a função.
16. Ative ou desative a notificação de e-mails
Prima a tecla de retrocesso.
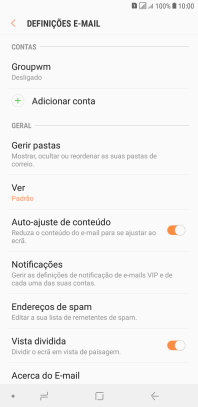
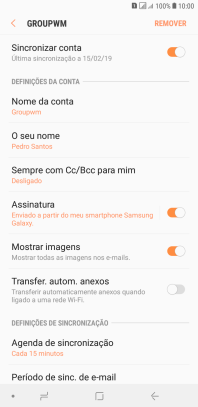
17. Ative a sincronização de e-mails
Prima a conta pretendida.


17. Ative a sincronização de e-mails
Prima o indicador junto a "Sincronizar conta" para ativar a função.
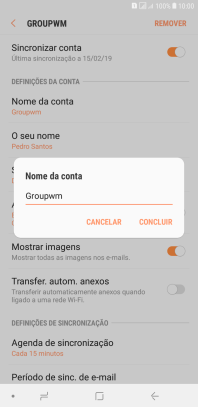
18. Introduza o nome da conta de e-mail
Prima Nome da conta.


18. Introduza o nome da conta de e-mail
Introduza o nome pretendido da conta de e-mail CONCLUIR.
19. Introduza o nome do remetente
Prima O seu nome.


19. Introduza o nome do remetente
Introduza o nome de remetente e prima CONCLUIR.
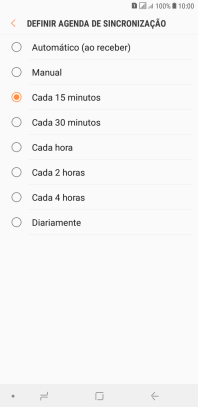
20. Escolha as definições de verificação de novos e-mails
Prima Agenda de sincronização.


20. Escolha as definições de verificação de novos e-mails
Prima Definir agenda de sincronização.


20. Escolha as definições de verificação de novos e-mails
Prima a definição pretendida.
21. Volte ao ecrã inicial
Prima a tecla de início para terminar e voltar ao ecrã inicial.
1. Procure "Contas"

2. Crie uma nova conta de e-mail
3. Introduza o endereço de e-mail
4. Introduza a password
5. Escolha o tipo de servidor
6. Introduza o nome de utilizador

7. Introduza o servidor de receção
8. Ative a encriptação na receção de e-mails
9. Introduza o número da porta de receção
10. Introduza o servidor de envio
11. Ative a encriptação no envio de e-mails
12. Introduza o número da porta de envio
13. Ative a autenticação SMTP
14. Volte ao ecrã inicial
15. Procure "E-mail"
16. Ative ou desative a notificação de e-mails

17. Ative a sincronização de e-mails
18. Introduza o nome da conta de e-mail
19. Introduza o nome do remetente

20. Escolha as definições de verificação de novos e-mails

21. Volte ao ecrã inicial