1. Procure "Contas e sincronização”
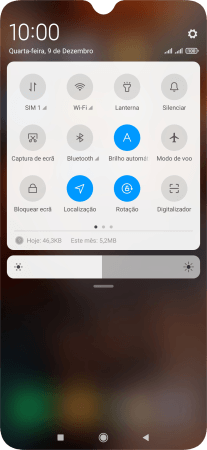
Deslize dois dedos sobre o ecrã de cima para baixo a partir do topo do ecrã.
![](http://wmstatic.global.ssl.fastly.net/ml/7121224-f-59398070-e4e7-469e-87a0-9b6e168e617a.png?width=208&height=450)
Prima o ícone de definições.
![](http://wmstatic.global.ssl.fastly.net/ml/7121224-f-20210482-fb78-4092-b55f-4b021bafbe76.png?width=208&height=450)
Prima Contas e sincronização.
![](http://wmstatic.global.ssl.fastly.net/ml/7121224-f-c5bddbf4-2f7d-4265-86fd-58f432e627b7.png?width=208&height=450)
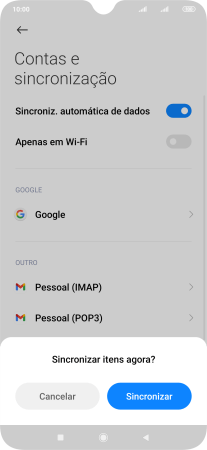
2. Ative ou desative a sincronização automática do conteúdo
Prima o indicador junto a "Sincroniz. automática de dados" para ativar ou desativar a função.
![](http://wmstatic.global.ssl.fastly.net/ml/7121224-f-07759a12-8833-47c5-bfb0-a97ccc08701d.png?width=208&height=450)
Prima OK.
![](http://wmstatic.global.ssl.fastly.net/ml/7121224-f-7ae2e38b-0644-40db-805e-4765a9011e18.png?width=208&height=450)
Se ativar a função, prima Sincronizar.
![](http://wmstatic.global.ssl.fastly.net/ml/7121224-f-79822949-58fa-4ab5-829d-7c79ffe9234d.png?width=208&height=450)
3. Volte ao ecrã inicial
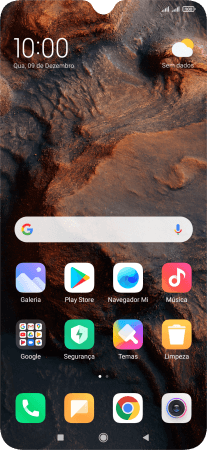
Prima a tecla de início para terminar e voltar ao ecrã inicial.
![](http://wmstatic.global.ssl.fastly.net/ml/7121224-f-07759a12-8833-47c5-bfb0-a97ccc08701d.png?width=208&height=450)