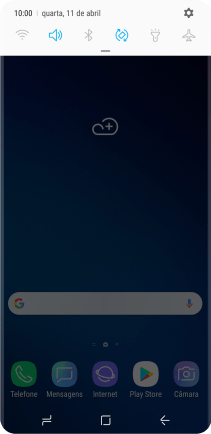
1. Procure "Contas"
Deslize o dedo para baixo a partir do topo do ecrã.
![](http://wmstatic.global.ssl.fastly.net/ml/7260922-f-386c9b1d-e56b-4380-9930-315d091d1f00.png?width=212&height=434)
Prima o ícone de definições.
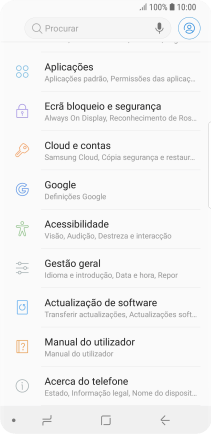
![](http://wmstatic.global.ssl.fastly.net/ml/7260922-f-c9e740d4-ae79-4614-bf53-b75386409121.png?width=212&height=434)
Prima Cloud e contas.
![](http://wmstatic.global.ssl.fastly.net/ml/7260922-f-5f6466db-9456-4935-80bc-a75f70f4b2f8.png?width=212&height=434)
Prima Contas.
![](http://wmstatic.global.ssl.fastly.net/ml/7260922-f-ad3dd1c3-1da4-4665-991a-9ef817a94816.png?width=212&height=434)
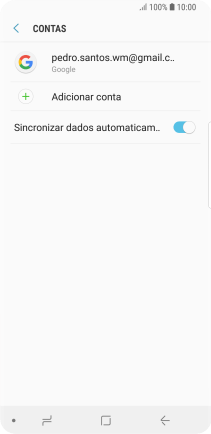
2. Escolha a rede social ou conta de e-mail
Prima a conta pretendida.
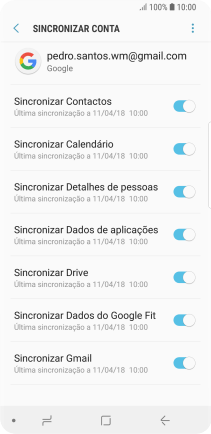
![](http://wmstatic.global.ssl.fastly.net/ml/7260922-f-1bf30e65-47f8-41d9-84cb-171ab12b7452.png?width=212&height=434)
3. Copie contactos
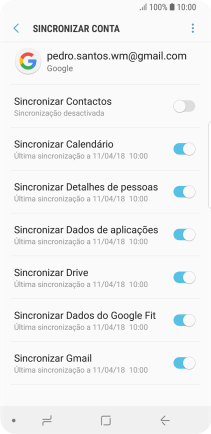
Prima Sincronizar conta.
![](http://wmstatic.global.ssl.fastly.net/ml/7260922-f-49edfe15-adc7-404a-b984-57244d919b03.png?width=212&height=434)
Prima o indicador junto a "Sincronizar Contactos" para ativar a função.
![](http://wmstatic.global.ssl.fastly.net/ml/7260922-f-9c6631a8-e1a8-421c-a662-4249ff8d632d.png?width=212&height=434)
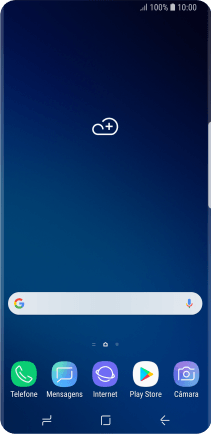
4. Volte ao ecrã inicial
Prima a tecla de início para terminar e voltar ao ecrã inicial.
![](http://wmstatic.global.ssl.fastly.net/ml/7260922-f-7b7b3b7e-df79-4705-87fa-e7f2669d1ee6.png?width=212&height=434)