1. Introduza o código PIN
Prima a tecla lateral.
Se o cartão SIM estiver bloqueado, deve introduzir o seu código PIN e premir a seta para a direita.
Se introduzir o código PIN errado três vezes, o cartão SIM é bloqueado. Para retirar o bloqueio do cartão SIM, deverá introduzir o código PUK (o código PUK recebido juntamente com o cartão SIM pode também ser solicitado ao Serviço de Apoio a Clientes pelo telefone 911691200 taxação rede móvel Vodafone). AVISO IMPORTANTE: Se introduzir o código PUK errado 10 vezes, o cartão SIM é bloqueado permanentemente. Nesse caso, deverá solicitar uma segunda via do seu cartão SIM ao Serviço de Apoio a Clientes ou numa loja Vodafone.
![](http://wmstatic.global.ssl.fastly.net/ml/7180923-f-a9300930-018e-4002-9bd2-07f89941bf62.png?width=204&height=452)
2. Escolha o idioma e a região
Prima a seta para a direita.
![](http://wmstatic.global.ssl.fastly.net/ml/7180923-f-23dd1ffc-d2e0-4ca0-9cf0-247be97d78c7.png?width=204&height=452)
Prima o idioma pretendido.
![](http://wmstatic.global.ssl.fastly.net/ml/7180923-f-1ef3cccc-0752-434d-8712-3d07e69cad5a.png?width=204&height=452)
Prima Avançar.
![](http://wmstatic.global.ssl.fastly.net/ml/7180923-f-1ef3cccc-0752-434d-8712-3d07e69cad5a.png?width=204&height=452)
Prima o país pretendido.
![](http://wmstatic.global.ssl.fastly.net/ml/7180923-f-66b5caba-59fc-4f0d-9b51-ce55d12af722.png?width=204&height=452)
Prima Continuar.
![](http://wmstatic.global.ssl.fastly.net/ml/7180923-f-66b5caba-59fc-4f0d-9b51-ce55d12af722.png?width=204&height=452)
3. Escolha as definições gerais
Prima o campo ao lado das definições pretendidas para as selecionar.
![](http://wmstatic.global.ssl.fastly.net/ml/7180923-f-77a1d511-ae93-4e71-b708-a66f0343b941.png?width=204&height=452)
Prima Seguinte.
![](http://wmstatic.global.ssl.fastly.net/ml/7180923-f-f5c6957d-8e75-4d85-bd7b-e0036791c551.png?width=204&height=452)
Prima o indicador junto a "Dados móveis" para ativar ou desativar a função.
![](http://wmstatic.global.ssl.fastly.net/ml/7180923-f-8c009f9a-15eb-4be8-9ee7-99c1831126cb.png?width=204&height=452)
Prima Seguinte.
![](http://wmstatic.global.ssl.fastly.net/ml/7180923-f-8c009f9a-15eb-4be8-9ee7-99c1831126cb.png?width=204&height=452)
4. Escolha a rede Wi-Fi
Prima a rede Wi-Fi pretendida.
![](http://wmstatic.global.ssl.fastly.net/ml/7180923-f-fb0923bf-6080-4043-b32a-d4d41c5ea6de.png?width=204&height=452)
Introduza a password da rede Wi-Fi e prima o ícone para aceitar.
Se não houver qualquer rede Wi-Fi disponível, pode em alternativa utilizar a rede móvel.
![](http://wmstatic.global.ssl.fastly.net/ml/7180923-f-1484cf17-3689-4918-998d-fbbf8b88c5b1.png?width=204&height=452)
Prima Seguinte.
![](http://wmstatic.global.ssl.fastly.net/ml/7180923-f-3998a7c9-93dd-499c-83d4-65fbcb2d7978.png?width=204&height=452)
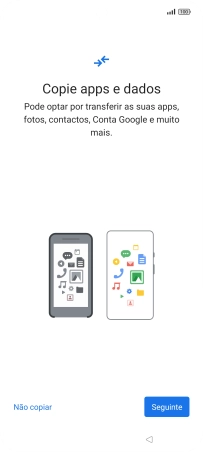
5. Defina o telefone como telefone novo
Prima Não copiar e siga as indicações no ecrã para terminar a ativação.
Pode também transferir conteúdo de outro telefone ou restabelecer conteúdo de uma cópia de segurança Google One.
![](http://wmstatic.global.ssl.fastly.net/ml/7180923-f-729c5828-fe6f-48df-b968-310dec35070c.png?width=204&height=452)