


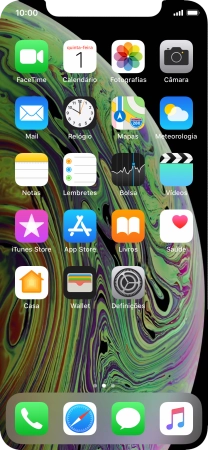
1. Procure "Tempo de ecrã"
Prima Definições.


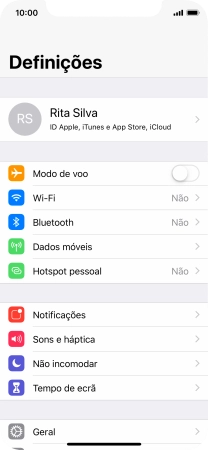
1. Procure "Tempo de ecrã"
Prima Tempo de ecrã.


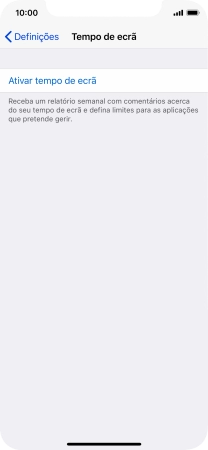
2. Ative o Tempo de ecrã
Prima Ativar tempo de ecrã.


2. Ative o Tempo de ecrã
Prima Continuar.


2. Ative o Tempo de ecrã
Prima Este iPhone é meu.


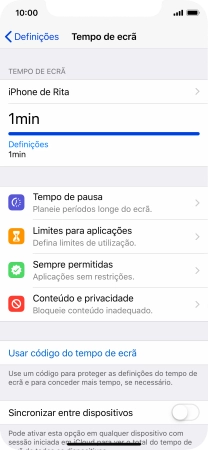
3. Escolha as definições para o Tempo de pausa
Prima Tempo de pausa.


3. Escolha as definições para o Tempo de pausa
Prima o indicador junto de "Tempo de pausa" e siga as indicações no ecrã para escolher o período para o Tempo de pausa.


3. Escolha as definições para o Tempo de pausa
Prima a seta para a esquerda.
4. Escolha os limites de tempo para uso de apps
Prima Limites para aplicações.


4. Escolha os limites de tempo para uso de apps
Prima Adicionar limite.


4. Escolha os limites de tempo para uso de apps
Prima as categorias pretendidas.


4. Escolha os limites de tempo para uso de apps
Prima o ícone para adicionar.


4. Escolha os limites de tempo para uso de apps
Defina o limite de tempo pretendido para uso da categoria selecionada.


5. Escolha os dias para o limite de tempo no uso de apps
Prima Personalizar dias.


5. Escolha os dias para o limite de tempo no uso de apps
Prima os dias pretendidos.


5. Escolha os dias para o limite de tempo no uso de apps
Escolha o período pretendido.
5. Escolha os dias para o limite de tempo no uso de apps
Prima a seta para a esquerda.


6. Apague os limites de tempo para uso de apps
Prima Apagar limite.


6. Apague os limites de tempo para uso de apps
Prima Apagar limite.
6. Apague os limites de tempo para uso de apps
Prima a seta para a esquerda.
7. Escolha as apps que podem ser usadas durante o Tempo de pausa
Prima Sempre permitidas.


7. Escolha as apps que podem ser usadas durante o Tempo de pausa
Prima o ícone para adicionar junto da app pretendida para a adicionar à lista de apps permitidas durante o Tempo de pausa.


7. Escolha as apps que podem ser usadas durante o Tempo de pausa
Prima o ícone para remover junto da app pretendida para a remover da lista de apps permitidas durante o Tempo de pausa.


7. Escolha as apps que podem ser usadas durante o Tempo de pausa
Prima Remover.
7. Escolha as apps que podem ser usadas durante o Tempo de pausa
Prima a seta para a esquerda.
8. Escolha as definições para conteúdo e privacidade
Prima Conteúdo e privacidade.


8. Escolha as definições para conteúdo e privacidade
Prima o indicador junto de "Conteúdo e privacidade" e siga as indicações no ecrã para escolher as definições para conteúdo e privacidade.


8. Escolha as definições para conteúdo e privacidade
Prima a seta para a esquerda.
9. Ative o uso da password
Prima Usar código do tempo de ecrã e siga as indicações no ecrã para escolher uma password para o Tempo de ecrã.
10. Volte ao ecrã inicial
Para voltar ao ecrã inicial, deslize o dedo de baixo para cima a partir da base do ecrã.
1. Procure "Tempo de ecrã"
2. Ative o Tempo de ecrã


3. Escolha as definições para o Tempo de pausa


4. Escolha os limites de tempo para uso de apps


5. Escolha os dias para o limite de tempo no uso de apps


6. Apague os limites de tempo para uso de apps


7. Escolha as apps que podem ser usadas durante o Tempo de pausa


8. Escolha as definições para conteúdo e privacidade


9. Ative o uso da password
10. Volte ao ecrã inicial