1. Procure "Contas"
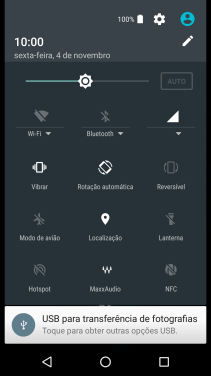
Deslize dois dedos sobre o ecrã de cima para baixo a partir do topo do ecrã.
![](http://wmstatic.global.ssl.fastly.net/ml/7121224-f-fb414203-316b-4c86-8084-f2ac56299883.png?width=212&height=376)
Prima o ícone de definições.
![](http://wmstatic.global.ssl.fastly.net/ml/7121224-f-8392866f-c852-468a-a967-0f6cc4a7613e.png?width=212&height=376)
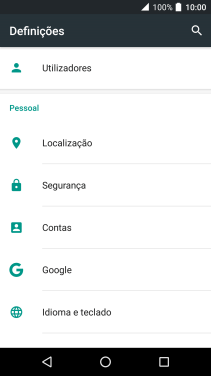
Prima Contas.
![](http://wmstatic.global.ssl.fastly.net/ml/7121224-f-3ad6f5e5-078f-4cf7-b91f-b9ac72069053.png?width=212&height=376)
2. Escolha a rede social ou conta de e-mail
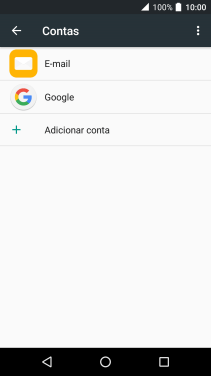
Prima o tipo de conta pretendido.
![](http://wmstatic.global.ssl.fastly.net/ml/7121224-f-25be4b7d-1b99-404f-9e24-e9ccc251dcac.png?width=212&height=376)
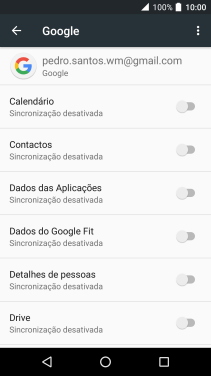
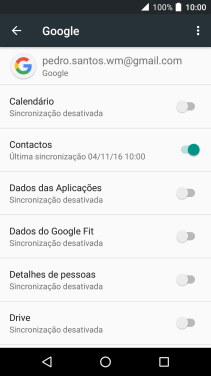
Prima Contactos para ativar a função.
![](http://wmstatic.global.ssl.fastly.net/ml/7121224-f-c4c5b396-bb97-4118-bc08-7f129d026a67.png?width=212&height=376)
3. Volte ao ecrã inicial
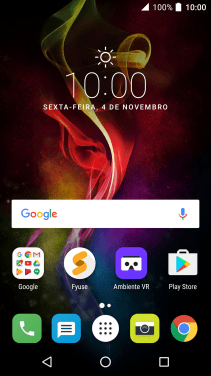
Prima a tecla de início para terminar e voltar ao ecrã inicial.
![](http://wmstatic.global.ssl.fastly.net/ml/7121224-f-72e1eb7b-baaa-4d61-8b26-d4ca77c85acc.png?width=212&height=376)